Abutments
Abutments
With two-part implant systems the implant replaces the root of a missing tooth. A titanium, precious metal alloy or zirconium oxide abutment (also implant abutment) is used as a core (also secondary unit). It is fitted in, on and/or around the implant.
Abutments are differentiated into different types depending on the function, e.g. definitive shapes of provisional abutments used to connect the implant with the superstructure. Abutments can copy the shape of a prepared tooth and/or incorporate a component of a connector (e.g. telescope crowns, press-stud systems, ball and socket units, bars, magnets). In these cases the superstructure envelops the respective complementary components.
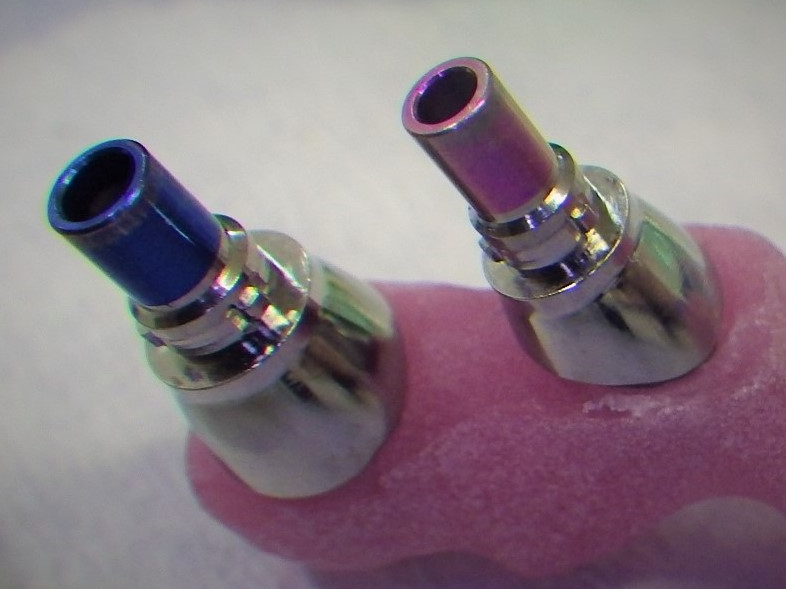 Two tube-in-tube abutments
The contact area between abutment and implant is also called the interface.
Though previously the diameter of the fitting surface of abutments was always the same as that of the implant platform, modern abutments are often smaller in this area. This so-called platform-switching is intended to result in improved bone preservation.
To avoid wear, stress peaks, leverage, loosening and material fatigue or even fracture, movements of abutment and implant against each other must be prevented. To ensure this, a precision fit must be achieved, i.e. as gap-free a three-dimensional fit as possible. Mainly two types of fit have become established: inner conical connection or cylindrical/parallel-walled tube-in-tube connection, each with additional interlocking slot and key to provide rotational security.
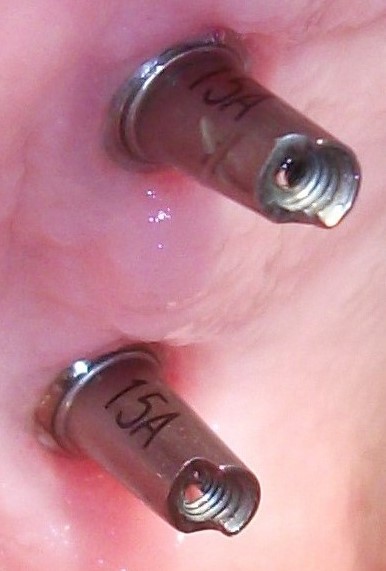 Rotationally secure conical abutments
Friction fit is achieved by pressing together the surfaces in contact (producing friction), seldom without the use of screws (using cold welding) and usually with a fixation screw tensioned to a defined torque. The torque is optimised so that on the one hand, wherever possible the screw, and consequently the abutment, cannot loosen and on the other hand the screw cannot fracture. Screw connections cause gaps, which can be colonised by bacteria. Special gels, which can be applied to the inside of the implant, are available for providing long-term disinfection.
Angled abutments are used to compensate for divergences of the axes of different abutments, i.e. achieve parallelisation to attain a common path of insertion. The number of possible positions of such non-rotationally symmetric abutments is determined according to the number of corners with rotationally secure polygon fits (e.g. triangular, hexagonal or octagonal). Having two types of angulation ("over the edge" and "over the corner" respectively), provides for twice as many positions as corners in total.
Prefabricated standard abutments can be fitted unaltered or modified (customised), e.g. clinically by preparation intraorally or by milling, casting-on, veneering in the laboratory. Customised abutments can also be fabricated – in particular using modern CAD/CAM procedures.
To avoid inaccessible excess cement, which could result in peri-implantitis and implant failure, the margins of cemented superstructures should always finish in the gingival region. This can be achieved by incorporating an appropriate metal collar to the correct height on the abutment – particularly with bone level implant platforms.
Impression-taking and transferring of intraoral positions can be performed at implant level (without abutment) or at abutment level (with fitted abutment). Laboratory analogues are available for specific situations in the latter case.
Want to give it a try ...
... or need professional advice?
Get in touch with us or click Contact.
Word of the day
| English | German |
|---|---|
| feeding aid | Fütterungshilfe |
Focus text of the month
Wax build-up technique Wax build-up technique The various anatomical structures (such as cusp tips and slopes as well as marginal ridges) are usually built up one after another by adding small portions of wax (often using differently coloured waxes for didactic purposes). The firm, special waxes first have to be melted at room temperature. This can be carried out by warming small portions on differently shaped working tips of hand instruments in an open flame (such as a gas burner) or using electrically heated instruments which provide for more accurate temperature control and avoid contamination (e.g. electric wax-knife, induction heaters, wax dipping units). The wax is applied drop-by-drop to ensure that the warmer molten wax added last fuses seamlessly with the firm, cooler material. After hardening, the wax pattern can be reduced by sculpting, milling guidance surfaces or drilling to add retainers. Modern procedures include flexible, occlusal preforms for adding contours to soft wax. In addition, wax preforms, such as for occlusal surfaces or bridge pontics, are available in various shapes and sizes. Recently, irreversible, light-curing materials have been introduced for use instead of reversible thermoplastic waxes.
To ensure that the wax pattern can be released without being damaged, model surfaces, opposing dentition and preparations must be hardened/sealed with special lacquer (applied by spraying, brushing or dipping). These waxes are mostly relatively rigid/elastic after cooling.
When employing the lost wax technique, prefabricated wax sprues, bars and reservoirs are attached to the patterns. Once the pattern has been released and its sprues waxed onto the crucible former, it is invested in a casting ring with refractory investment material. The wax can then be burnt out residue-free and casting completed. Unlike standard wax build-up techniques, a diagnostic wax-up is not intended for fabricating an indirect restoration, but rather for simulating the appearance and/or external contouring for producing orientation templates. |
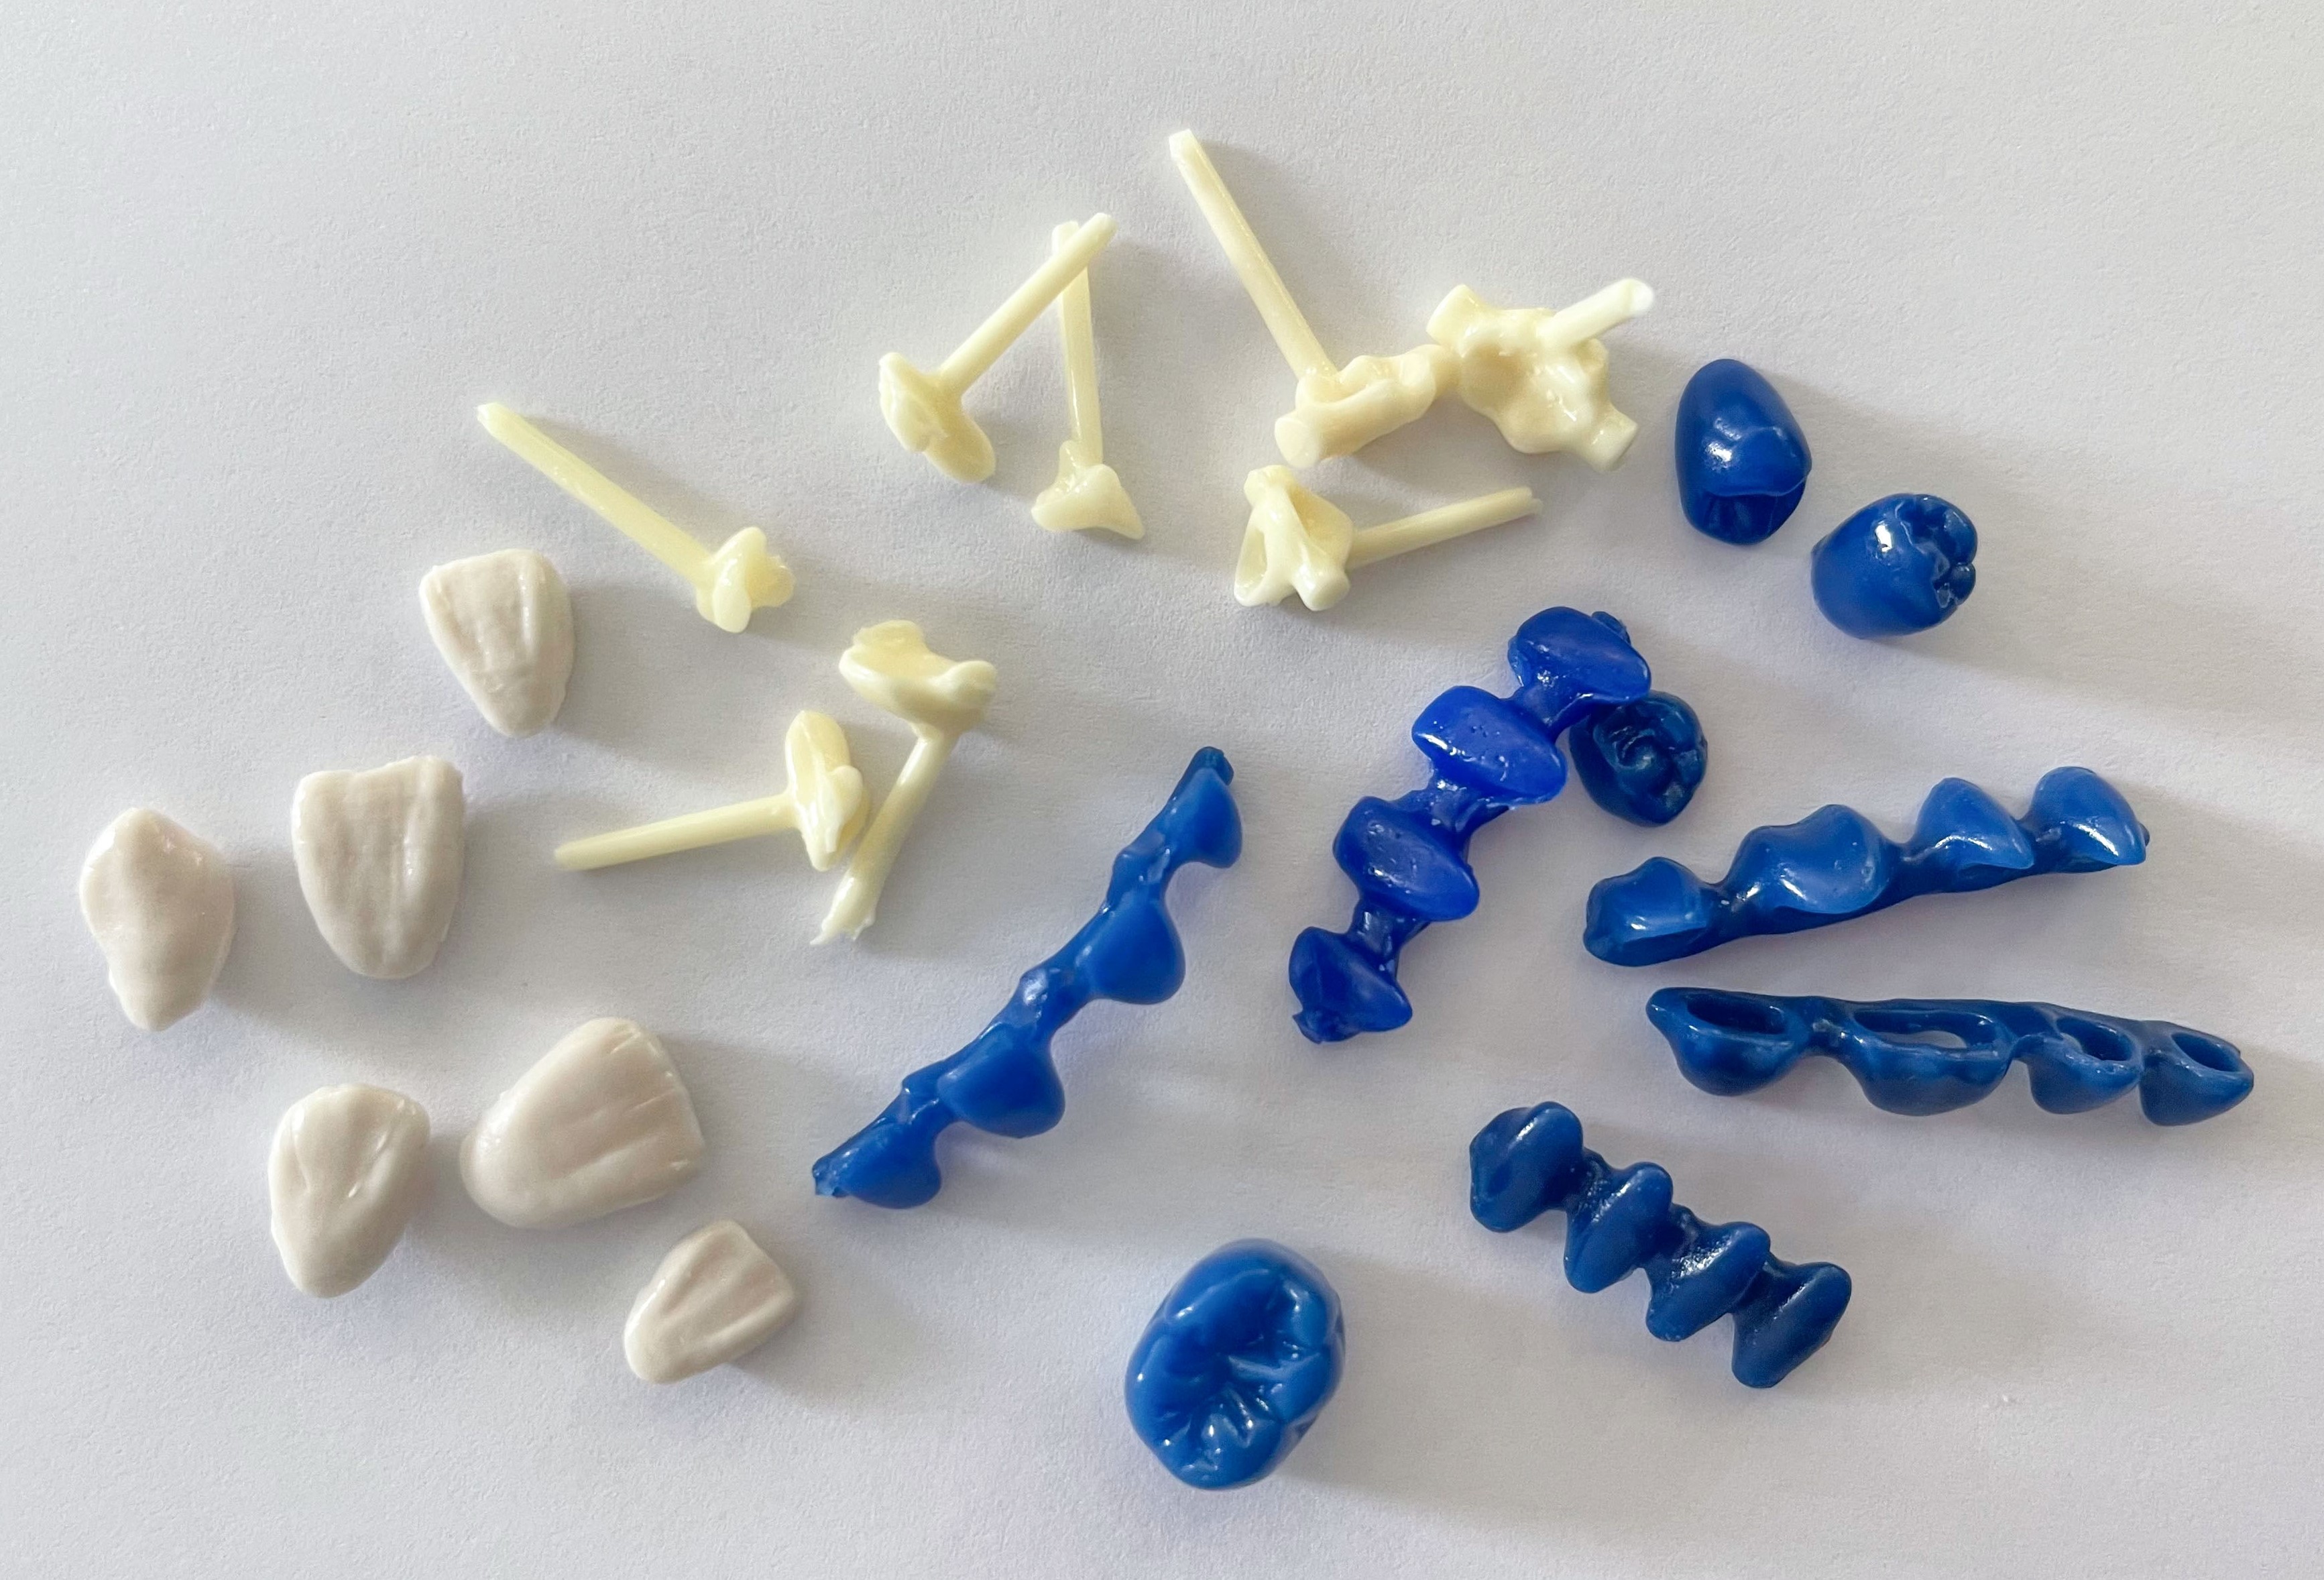 Wax preforms
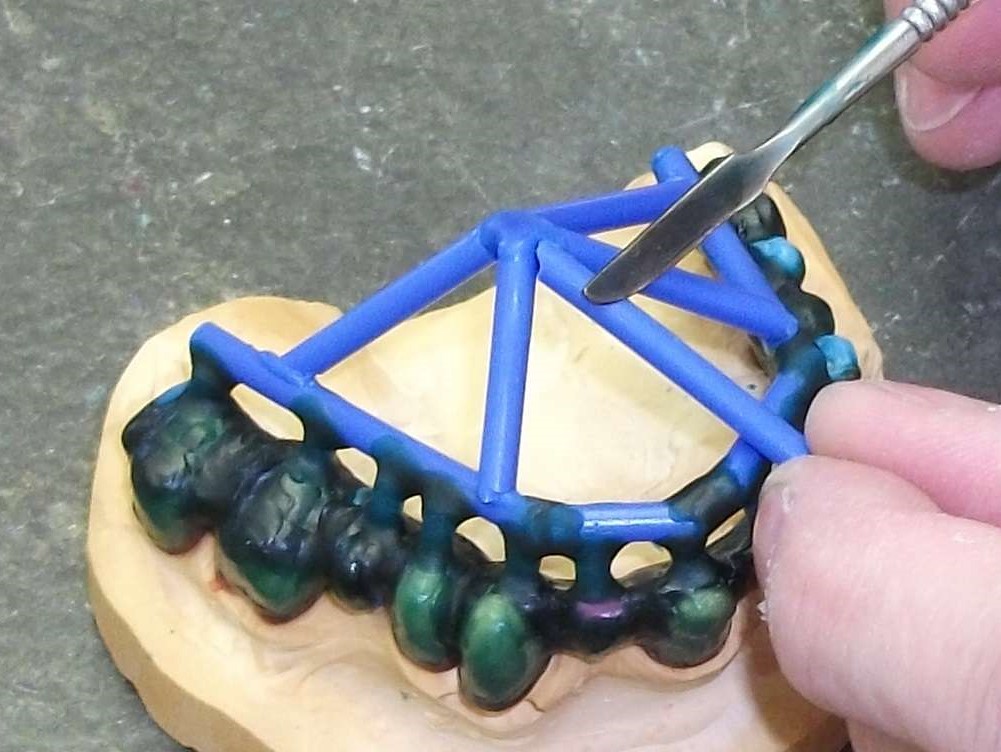 Attaching wax sprues to a removable framework supported on double crowns using a hand instrument